 info@bamchocolate.com
 Login


 en

 BAM Cake converter
 Login
Claudia
Avtorica vsebin


 Reading time:
12 minutes
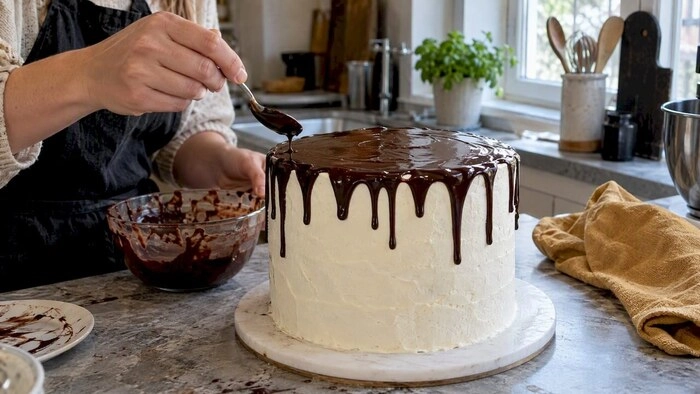
Choose chocolate for drip cakes with BAM - Become A Master. Use ratios, temperature checks, and a spoon test to get clean drips with couverture or compound.
For most drip cakes, couverture chocolate gives the glossiest, most reliable result, and a 1:2 ratio of chocolate to cream produces a smooth, pourable drip for dark chocolate. We stock couverture and other baking chocolate through BAM Chocolate for home bakers who want recipe-grade results. Temperature control and a quick spoon test decide whether your drip runs cleanly or pools at the base.
Couverture chocolate contains a higher proportion of cocoa butter than standard baking chocolate or chips. That extra cocoa butter is what gives a finished ganache its shine and lets it melt into a smooth, pourable liquid rather than a thick paste. Pastry professionals favour couverture for drip cakes because the higher fat content melts evenly and sets with a glass-like finish rather than a dull one.
Compound chocolate swaps some or all of that cocoa butter for vegetable fat. It is less fussy to work with, holds its shape better in a warm kitchen, and survives transport without softening as quickly. If your cake needs to travel to a venue on a hot day, compound chocolate is the more forgiving choice, even though it trades away some of the gloss and flavour depth couverture offers.
Milk and white chocolate behave differently again. Milk chocolate ganache needs a slightly different cream ratio because it already contains milk solids and sugar, which affects how it sets. White chocolate needs even more adjustment: it has a higher sugar and milk solid content and less cocoa mass, so a standard 1:2 ratio will usually leave it far too thin to hold a drip shape.
A few practical points worth keeping in mind when choosing your chocolate:
Whichever type you choose, the quality of the chocolate affects both the finish and how predictable the drip behaves, which makes sourcing a good couverture or baking chocolate worth the extra attention.
The ratio between chocolate and cream is the single biggest variable in how a drip behaves. Standard ganache ratios used by recipe authors put a pourable glaze at roughly 1 part chocolate to 2 parts cream, a slightly thicker drip at 1:1.5, and a firmer ganache suited to filling or truffles at 2:1.
| Chocolate type | Ratio (chocolate:cream) | Texture result |
|---|---|---|
| Dark chocolate | 1:2 | Pourable, glossy drip |
| Dark chocolate | 1:1.5 | Thicker drip, slower run |
| Milk chocolate | 1:1.5 | Pourable drip, less liquid needed |
| White chocolate | 3:1 | Pourable drip despite higher chocolate ratio |
Dark chocolate ganache drip (makes enough for one 20cm cake):
Milk chocolate ganache drip:
White chocolate ganache drip:
Cream fat percentage changes how the ganache sets. High-fat heavy cream between 36 and 40% produces a more stable emulsion and a glossier finish than lower-fat cream, which can leave the ganache looking flat or prone to splitting. Chopping the chocolate finely before adding the hot cream also helps it melt evenly rather than leaving unmelted lumps that cause graininess.
Ganache can be made ahead and held at room temperature for a few hours if your kitchen is cool, or refrigerated and gently rewarmed before use. Avoid leaving it at room temperature for extended periods once it contains dairy.
Temperature is what separates a clean drip from a sad puddle at the base of your cake. Ganache applied too hot runs straight down and off the cake; applied too cold, it clings in thick blobs that never move. A working range of roughly 30 to 35°C suits most dark and milk chocolate ganaches, though you should always confirm with a test rather than relying on a thermometer alone.
The most reliable check is a simple spoon test. Dip a spoon into the ganache and let it drip from the edge: if it falls in a thin, steady stream and holds its shape partway down, it is ready. For a more realistic check, apply a small amount to the edge of your chilled cake and watch how far it travels in the first ten seconds.
To adjust, warm gently over a bain-marie in short bursts rather than using direct heat, which can scorch the chocolate. To cool a ganache that has gone too thin, chill it in short five-minute increments, stirring between each, rather than leaving it in the fridge unattended where it can set unevenly.
Pro Tip: Chill your crumb-coated cake for at least 20 minutes before applying any drip, so the surface stays cold enough to set the ganache the moment it touches the cake.
If you are working in a warm kitchen or need to transport a finished cake, compound chocolate’s resistance to heat becomes genuinely useful, since a couverture drip can soften or slide in transit on a hot day.
The tool you choose for applying a drip affects how much control you have over its length and shape.
Keeping a small bowl of warm water nearby for your tools makes clean-up between pulses faster and helps prevent ganache from setting on the tip of a piping bag or bottle.
Most ganache problems are fixable without starting again. A split or oily-looking ganache has usually separated because it was overheated or mixed with cream that was too cold. The fix recommended by King Arthur Baking is to add a small amount of warm water, around 32 to 35°C, and whisk vigorously until the mixture comes back together and regains its shine.
If a ganache has scorched or developed a burnt smell, it is best to remake the batch rather than try to rescue it, since no amount of re-emulsifying will fix a damaged flavour.
Reliable drip results come down to two things working together: good chocolate and consistent technique. As the author of this guide, Andraz draws on practical, kitchen-tested methods for working with couverture, compound and specialty chocolates in home baking settings.
Bamchocolate is an e-commerce retail platform specialising in high-quality baking ingredients, confectionery products and gourmet chocolate items, which makes it a practical starting point for sourcing the couverture, cream-compatible chocolate and accessories referenced throughout these recipes.
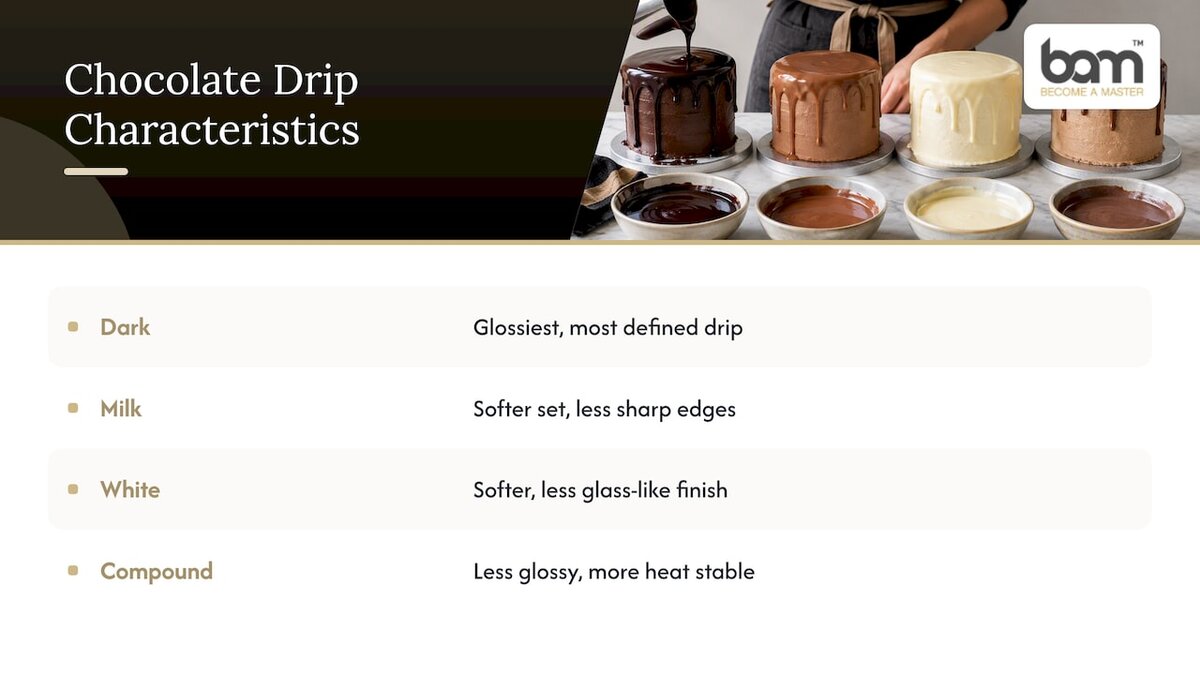
Dark chocolate ganache tends to produce the glossiest, most defined drip, since its lower sugar content and higher cocoa mass let it set with a clean edge and a deep, reflective shine. Milk chocolate ganache sets slightly softer and often looks a touch less sharp at the edges, because the added milk solids soften the set compared with dark chocolate.
White chocolate behaves the most differently of the three. Its higher sugar and milk solid content means it needs a much higher chocolate-to-cream ratio, often around 3:1, to hold a drip shape at all, and even then the finished look tends to be softer and less glass-like than a dark chocolate drip. Pigmented white ganache needs gel-based colouring rather than liquid, since any extra liquid thins the mixture further and can turn a workable drip into one that runs straight off the cake.
Compound chocolate drips generally look slightly less glossy than couverture ones regardless of colour, a trade worth making when heat stability matters more than shine, such as for a cake travelling to an outdoor event.
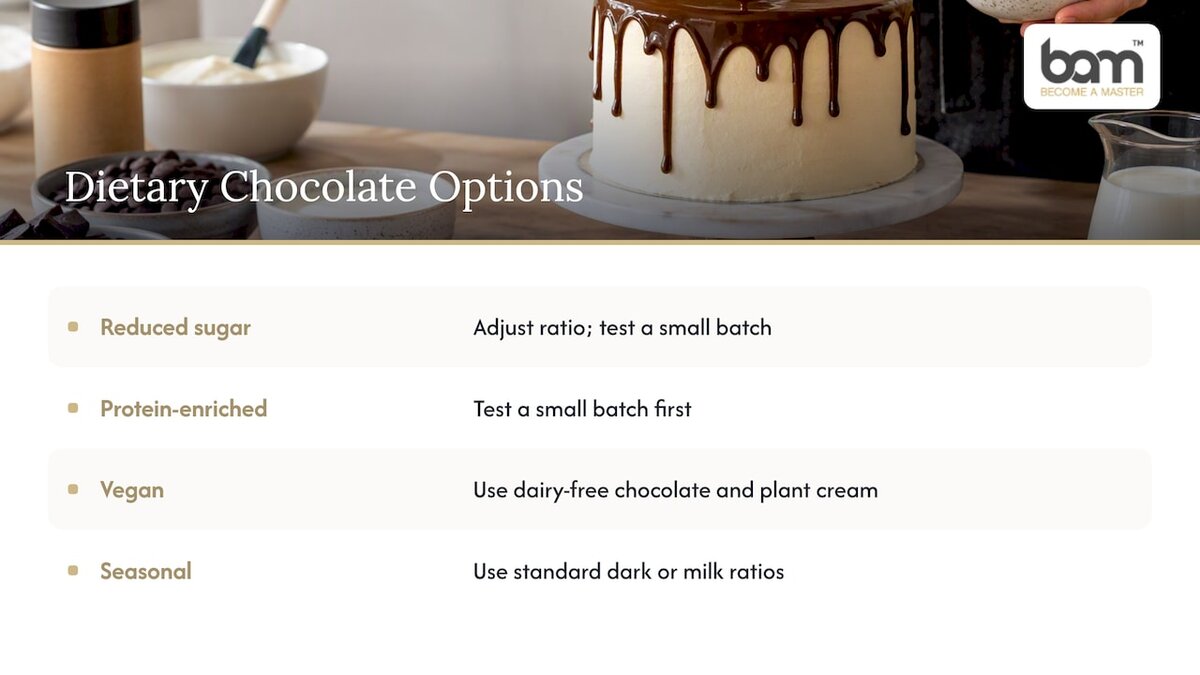
Sugar-free and reduced-sugar chocolate can be used for a drip, though the altered sugar content changes how the ganache sets, so expect to adjust your ratio slightly compared with a standard recipe and test before committing to a full batch. Protein-enriched chocolate, often used by fitness-focused bakers, behaves similarly and benefits from the same small-batch testing approach before you commit to a full cake.
Vegan drip cakes typically rely on dairy-free chocolate combined with a plant-based cream alternative, such as coconut cream, in place of heavy cream. The higher fat content in full-fat coconut cream makes it a reasonably close substitute for dairy cream in terms of texture, though the flavour will carry a mild coconut note worth considering alongside the cake’s other flavours.
Seasonal variations such as spiced or flavoured chocolate can be used in the same ratios as standard dark or milk chocolate, since the base cocoa content usually behaves similarly. Whichever option you choose, run the same spoon test described earlier before committing to a full application, since dietary substitutes can shift viscosity even when the ratio looks right on paper.
Couverture wins on flavour and shine, but it is not always the right call. For a cake staying indoors in a cool kitchen, we would always start with couverture and the standard ratios above. For anything travelling, especially in warm weather, compound chocolate’s stability matters more than the extra gloss you would be chasing. Choosing between the two is less about which is “better” and more about matching the chocolate to the conditions your cake will actually face.
— Andraz
Good ratios only get you so far without chocolate that melts evenly and cream-compatible ingredients that behave the way a recipe expects. Our BAM Chocolate range gives you couverture and baking chocolate suited to the ganache recipes above, and our baking accessories cover the piping bags, squeeze bottles and scales that make those ratios repeatable. Shop ingredients and tools at BAMChocolate.com and build your next drip cake with chocolate chosen for the job.
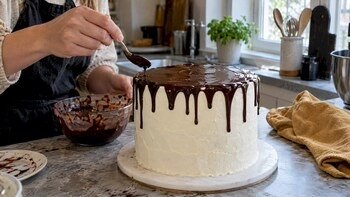
Warm your ganache to roughly 30 to 35°C, chill the cake’s crumb coat first, then apply the ganache along the top edge in short pulses so gravity pulls it partway down before it sets. A quick spoon test before application confirms the consistency is right.
Couverture chocolate is generally the best choice for a drip cake because its higher cocoa butter content gives a glossier, smoother finish than compound chocolate or standard chips. Compound chocolate is a better choice when the cake needs to withstand heat or travel.
Melted chocolate on its own sets too hard and too quickly to flow into a smooth drip, so it needs to be combined with cream to form a ganache. A 1:2 ratio of chocolate to cream is a reliable starting point for a pourable dark chocolate drip.
Finely chopped couverture or good-quality baking chocolate melted into a ganache gives the smoothest drizzle, since its higher cocoa butter content melts evenly and flows without seizing. White chocolate needs a much higher chocolate-to-cream ratio, often around 3:1, to drizzle rather than run too thin.


 Confectionery tips


 Slovenščina
 Hrvatski
 Deutsch
 Italiano
 Česky
 Polski
 Magyar
 Français
 Slovák
 Nederlands
 Español