 info@bamchocolate.com
 Login


 en

 BAM Cake converter
 Login
Claudia
Avtorica vsebin


 Reading time:
12 minutes
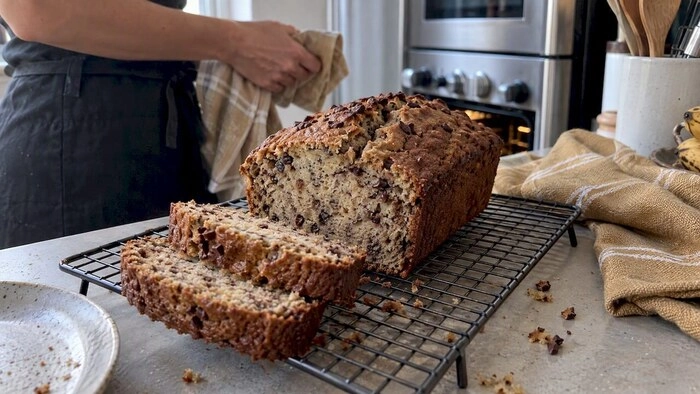
Learn to toast and fold cocoa nibs for lasting crunch, adjust amounts for cookies and muffins, try three recipes, and find nibs and baking tools at BAM.
Yes, cocoa nibs work well in baking, adding crunchy, bitter chocolate flavour that stays put rather than melting away. We treat them as a fold-in, a topping, or a flavour infusion after a quick toast. Because nibs carry none of the added sugar found in chocolate chips, we usually trim the sugar in a recipe slightly when nibs take their place.
Cocoa nibs, also called cacao nibs, are shelled and cracked cacao beans with the husk winnowed away, leaving small, hard pieces of pure chocolate in its most unprocessed form. They carry none of the sugar, milk or added fat found in chocolate chips, which is why cacao nibs are unsweetened shards of shelled, crushed cacao beans that deliver intense, bitter flavour and a crunchy bite.
Roast level changes the character considerably. Roasted nibs taste rounder and more aromatic, with the raw bitterness softened into something closer to dark chocolate; raw nibs stay brighter and more acidic, with a sharper edge that some bakers prefer for contrast against sweet batters. Home roasting is straightforward:
Heat does reduce some of the antioxidant content in raw cacao, so when that matters to a recipe’s purpose, uncooked uses such as sprinkling over yoghurt or granola preserve more of those compounds than a long bake. When shopping, check the roast level stated on the pack, the origin of the beans and the pack size, since nibs sold for snacking are sometimes coarser than those marketed for baking.
Nibs do not behave like chocolate chips in the oven. They stay hard and crunchy through baking rather than softening or pooling, which means timing and quantity matter more than with standard chips.
Pro Tip: Fold nibs in last and work quickly: the longer they sit in a wet batter before baking, the softer their edges become, and you lose some of that signature crunch.
Storage affects the final result as much as technique. Keep raw nibs in a cool, dry place in an airtight container, away from direct light, so they do not pick up moisture or stale flavours from the pantry. Once baked, goods containing nibs hold their crunch best in a cool, airtight container and are at their peak within three to five days.
Swapping nibs into a recipe written for chocolate chips changes more than texture: it strips out sugar and fat the original recipe relied on for moisture and sweetness. A one to one swap works for bakers who want maximum crunch and minimum sweetness, but many bakers find a 50:50 blend of nibs and chips an easier starting point, since it balances bitterness while keeping some melt and gloss in the finished bake.
These three bakes each lean on a different technique, fold-in, topping, and post-bake addition, so you can see how the same ingredient behaves differently depending on when it meets the heat.
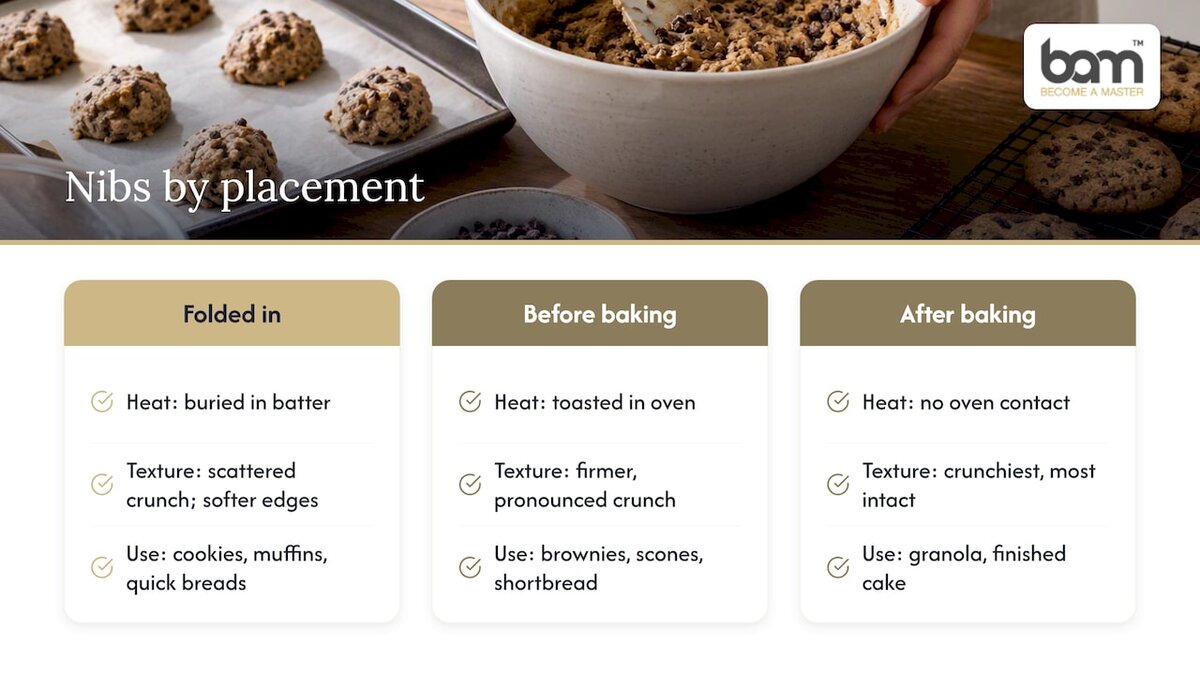
Where you put the nibs in a recipe changes the final texture more than almost any other variable. Folded into a dough or batter, nibs become part of the structure: they sit suspended in the crumb, soften very slightly at their edges from contact with moisture, and give a steady, scattered crunch throughout each bite. This works well in cookies, muffins and quick breads, where you want the chocolate flavour distributed rather than concentrated.
Used as a topping, pressed or sprinkled onto the surface before baking, nibs toast directly in the oven’s heat and develop a slightly deeper, more roasted flavour than nibs buried inside a batter. The texture here is firmer and more pronounced, since the nibs on top are not softened by surrounding moisture. This suits brownies, scones and any bake where a visible, craggy top is part of the appeal.
Adding nibs after baking, stirred into granola once it has cooled, or scattered over a finished cake, keeps them at their crunchiest and most intact, since they never meet oven heat at all. This is the method to choose when the point of the nibs is pure texture contrast rather than integrated flavour.
None of these approaches is more correct than another; they simply produce different results. A dense fruit cake benefits from nibs folded into the batter, where their bitterness cuts through the sweetness. A simple shortbread benefits from a topping application, where the toasted crunch becomes the main event.
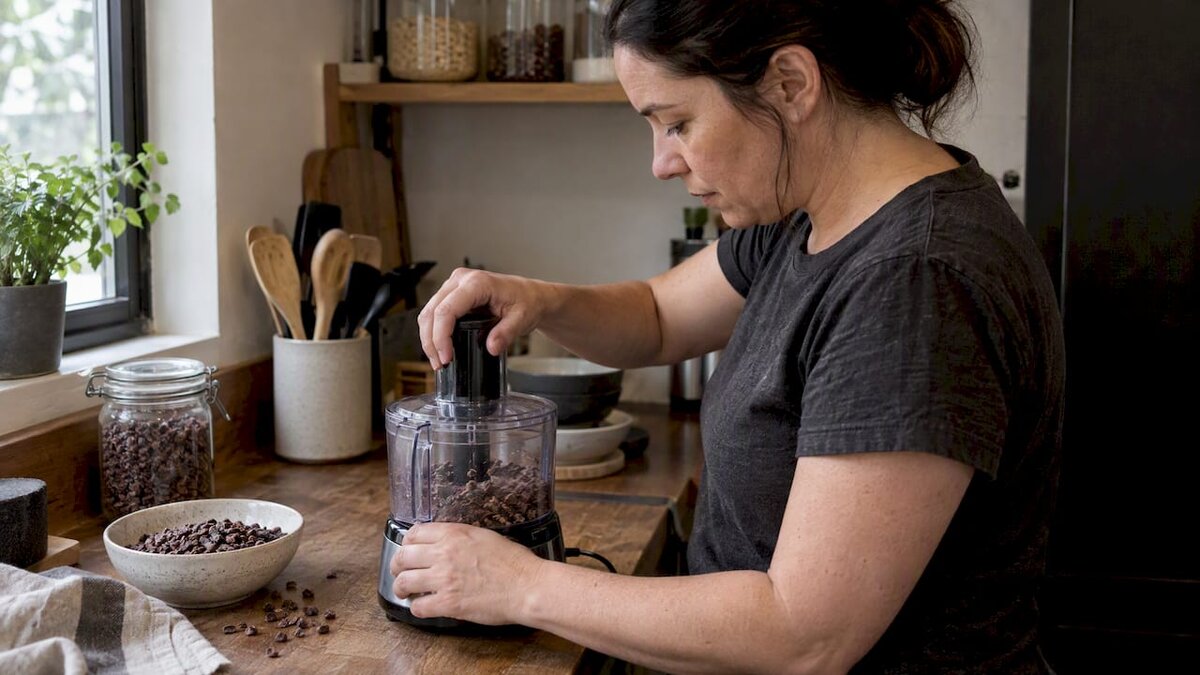
Nibs do not need to stay whole to be useful. For recipes where a hard, nut-sized piece would be out of place, a food processor or spice grinder brings them down to a size that suits the batter.
A few pulses in a food processor break whole nibs into coarse, nut-like pieces, which work well folded into muffins or quick breads where a gentler bite is wanted. Chopping or pulsing nibs produces a texture closer to chopped nuts than to chocolate chips, which is useful when a recipe calls for a less toothsome ingredient.
Grinding nibs further, closer to a fine powder, turns them into something that behaves more like cocoa powder with texture still present, suitable for stirring into a sponge batter or dusting over a finished bake. A longer grind in a food processor, run until the nibs release some of their natural fat, produces a coarse paste that can be worked into frostings or fillings for a grainy, intensely chocolatey finish rather than the smooth result you would get from melted chocolate.
The right level of processing depends entirely on the bake. Whole nibs for cookies and granola. Coarsely chopped for muffins and breads where you want crunch without large pieces. Finely ground or pulsed to a paste for frostings, fillings or any application where nibs need to blend rather than stand out.
Cocoa nibs appeal to bakers partly because of what they leave out. They contain none of the added sugar found in most chocolate chips and carry antioxidants naturally present in cacao, making them a reasonable substitute for bakers trying to reduce added sugar in a recipe without losing chocolate flavour.
Some of that antioxidant content is reduced by heat, so a bake that goes into a hot oven for 25 minutes will retain less of the original antioxidant profile than nibs eaten raw, scattered over yoghurt or folded into a no-bake energy bar. For anyone specifically chasing that nutritional angle, uncooked or lightly baked applications make more sense than a long bake at high heat.
Nibs are also naturally free of dairy and gluten themselves, which makes them a straightforward addition to dairy-free or gluten-free baking, provided the rest of the recipe is formulated accordingly. Because they are unsweetened, they suit bakers managing sugar intake who still want a genuine chocolate hit rather than a sugar-free chocolate substitute. As with any concentrated source of caffeine and theobromine, moderation matters for anyone sensitive to stimulants, since nibs carry both compounds in their natural, unprocessed form.
Cocoa nibs earn their place well outside the cookie jar. A plain pound cake or olive oil cake benefits from nibs folded into the batter, where their bitterness offsets the cake’s sweetness without the richness a full chocolate cake would bring. A banana bread or zucchini bread takes nibs the same way walnuts are traditionally used, folded in just before the batter goes into the tin, giving pockets of crunch through an otherwise soft crumb.
Scones and soda bread take well to nibs pressed into the dough before baking, where the heat toasts the exposed pieces and gives a slightly bitter contrast to a sweet glaze or jam. For a simple dessert rather than a bake, nibs scattered over panna cotta, rice pudding or a bowl of good vanilla ice cream add crunch and chocolate flavour without melting into the dish, which is exactly the quality that makes them unsuitable for ganache but ideal here.
Granola bars, energy balls and no-bake slices are worth mentioning too, since they let nibs stay completely raw and retain their full flavour and nutritional profile, with no oven involved at all.
We find the biggest difference between a good nib recipe and an average one comes down to small-batch testing: adjusting roast level, swap ratio and fold-in timing one variable at a time rather than guessing. Try one change per batch, taste, then adjust. Our product pages reflect the same approach to sourcing nibs and accessories for home kitchens.
— Andraz
We sell cocoa nibs and the ingredients that pair well with them through BAM Chocolate, with options across roast level and pack size suited to a single test batch or a season of regular baking. Alongside the nibs themselves, we carry baking accessories such as trays, sieves and grinders that make toasting and processing nibs at home straightforward.
Selections are curated for home bakers rather than bulk commercial buyers, so pack sizes stay practical for kitchen use rather than catering volumes. For bakers who want to pair nibs with complementary flavours, we also stock spreads and dressings that work well alongside a nib-forward bake.
Browse the range, pick a roast level that suits your recipe, and start your next batch with ingredients chosen for exactly this kind of baking.
Yes, cocoa nibs work well in a wide range of baked goods, from cookies to muffins to granola, where they add crunch and bitter chocolate flavour. They are best folded in towards the end of mixing or used as a topping, since prolonged mixing or soaking softens their edges.
No, cocoa nibs do not melt the way chocolate chips do. Nibs stay hard and crunchy through baking rather than softening into pools, which is why they suit recipes where texture contrast matters more than a melted finish.
Either works, but roasted nibs give a rounder, more aromatic flavour closer to dark chocolate, while raw nibs stay brighter and more bitter. Toasting nibs at 160 to 180°C for 5 to 10 minutes is a simple way to deepen their flavour before baking with them.
Cocoa nibs are not designed to melt smoothly the way chocolate chips or couverture do, since they lack the added fat and sugar that give chocolate its flow. For any recipe needing melted chocolate, such as a ganache or glaze, standard chocolate or couverture remains the better choice.
A reasonable starting point is cutting granulated sugar by 15 to 25 grams per 200 grams of flour when replacing chips entirely with nibs, since nibs carry none of the sweetness chips do. Tasting the batter or dough where practical helps fine-tune the balance for your particular recipe.


 Confectionery tips


 Slovenščina
 Hrvatski
 Deutsch
 Italiano
 Česky
 Polski
 Magyar
 Français
 Slovák
 Nederlands
 Español