 info@bamchocolate.com
  Login
Login 

 en
en 
 BAM Cake converter
  Login
Login Claudia
Avtorica vsebin


 Reading time:
10 minutes
Reading time:
10 minutes 
Discover how to prepare festive desserts that wow your guests! Learn practical techniques, step-by-step recipes, and troubleshooting tips.
TL;DR:
- Preparing festive desserts with proper chilling, temperature control, and advance planning ensures impressive results and stress-free celebrations. Good ingredient quality, suitable tools, and patience during setup are key to avoiding common baking mistakes and achieving visually appealing, delicious treats. Most make-ahead desserts, like cheesecakes and trifles, benefit from overnight refrigeration, allowing flavors to meld and layers to firm, enhancing presentation and taste.
Knowing how to prepare festive desserts that actually impress a crowd is one of those skills that separates a stressful celebration from a genuinely enjoyable one. Most home bakers run into the same problems: desserts that won’t set, crusts that turn soggy, or recipes that take far longer than expected. This guide cuts through all of that. You’ll find practical preparation techniques, step-by-step instructions for crowd-pleasing festive dessert recipes, and clear troubleshooting advice so you can walk into any celebration feeling prepared rather than panicked.
| Point | Details |
|---|---|
| Chill times are non-negotiable | No-bake desserts need at least 6 to 8 hours of refrigeration for a proper set and clean slices. |
| Temperature matters for texture | Cold cream cheese and cold heavy cream are critical for smooth, stable no-bake fillings. |
| Make ahead where possible | Trifles and layered desserts taste better when assembled 24 hours before serving. |
| Batch baking saves time | A 9x13-inch pan yields 18 to 24 servings, making it ideal for feeding larger groups efficiently. |
| Freeze smartly | Most doughs and crusts freeze well for up to one month without losing quality. |
Before you start any seasonal dessert preparation, getting your ingredients and equipment in order makes everything else easier. Rushing into a recipe without the right tools or the wrong temperature of butter is where most problems begin.
A well-stocked pantry for festive baking typically includes:
Ingredient freshness matters more than most people realise. Stale spices lose their potency quickly, and old cream cheese can affect both texture and taste. Check dates before you shop.
You do not need a professional kitchen to produce excellent results. A few key pieces of equipment cover the vast majority of festive dessert recipes:
| Tool | Purpose |
|---|---|
| 9x13-inch rectangular pan | Batch baking bars, slabs, and cheesecake-style desserts |
| Stand or hand mixer | Whipping cream and beating cream cheese to smooth consistency |
| Springform tin (20 or 23cm) | Classic round cheesecakes and tarts |
| Mixing bowls (various sizes) | Separating wet and dry ingredients |
| Offset spatula | Smoothing fillings and frosting cleanly |
| Trifle bowl or glass dish | Layered dessert presentation |
| Flat-bottomed glass or ramekin | Pressing biscuit crusts evenly |
Pro Tip: Chill your mixing bowl in the freezer for 10 minutes before whipping cream. Cold equipment helps the cream reach stiff peaks faster and hold its structure longer.
Chilling doughs and fillings for 24 to 48 hours is not optional when you want the best texture and spice complexity. Write out a prep timeline before the celebration. Decide which desserts can be made two or three days in advance, which need assembling the night before, and which require day-of finishing touches.
These are the desserts that consistently please crowds and hold up well for parties. Each one has a specific technique that makes the difference between good and genuinely impressive.
This is one of the most reliable easy holiday desserts for celebrations because it requires no oven time and can feed a large group from a single tin.
Pro Tip: Run a warm knife under hot water, dry it, and slice immediately. Repeat between each cut for perfectly clean cheesecake slices.
Trifles are among the most forgiving and visually impressive simple festive sweets you can make. They require no baking if you use shop-bought gingerbread cake, and they genuinely improve with time.
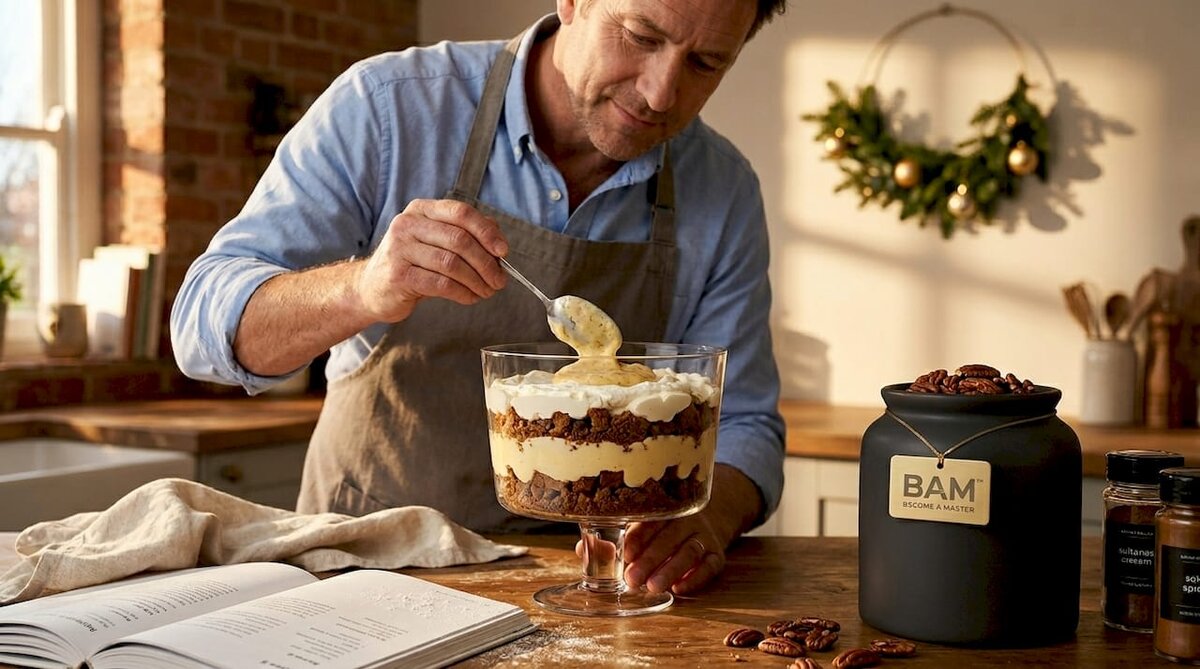
Layer crumbled gingerbread cake, spiced custard, whipped cream, and toasted walnuts or pecans in a clear trifle bowl. Repeat the layers until the bowl is full, finishing with cream and a garnish of crushed ginger biscuits. Assembling the trifle 24 hours before serving allows the cake to absorb moisture from the custard, creating a cohesive, pudding-like texture that tastes far better than a freshly assembled version.
For feeding larger groups, bars and slabs are the most efficient format. A 9x13-inch pan yields 18 to 24 servings with prep time under 40 minutes, making them one of the best festive pastry recipes for parties.
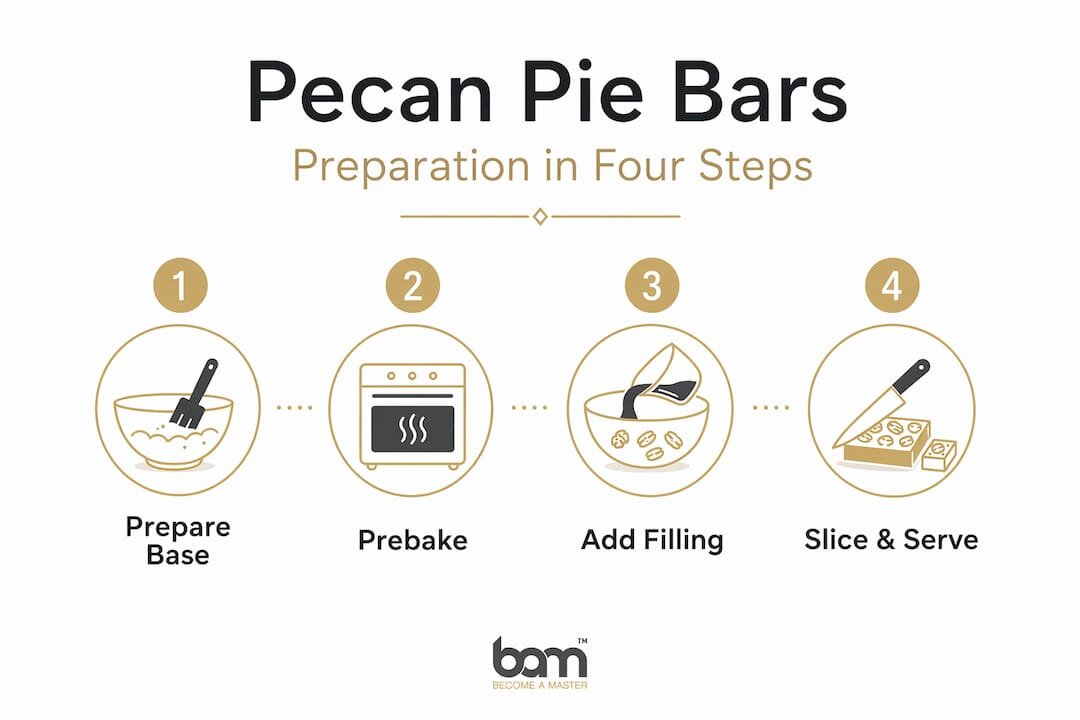
Use a shop-bought shortcrust pastry sheet pressed into the pan as your base. Pre-bake it for 10 minutes at 180°C until just set. Pour over a filling of brown sugar, golden syrup, eggs, butter, and vanilla, then scatter generously with pecan halves. Bake for a further 25 to 30 minutes until the filling is just set with a slight wobble. Cool completely before slicing into bars.
Even experienced bakers make these errors. Knowing what to look for saves you from a last-minute disaster.
“The difference between a dessert that impresses and one that disappoints usually comes down to one thing: patience with the chilling process. Give your desserts the time they need.”
Pro Tip: If your no-bake cheesecake filling looks loose after mixing, do not panic. Return it to the fridge for 30 minutes before spreading into the crust. A brief chill firms the mixture enough to work with.
Air incorporation from whipped cream is what gives no-bake cheesecake its light, mousse-like texture. The folding technique matters. Use a large rubber spatula and cut down through the centre of the mixture, sweep along the bottom of the bowl, and fold up and over. Rotate the bowl a quarter turn and repeat. Stop as soon as the mixture is uniform. Over-folding deflates the air you have worked to incorporate.
Planning your festive dessert schedule around make-ahead possibilities is the difference between a relaxed host and a frantic one.
| Dessert type | Refrigerator | Freezer |
|---|---|---|
| No-bake cheesecake | 3 to 4 days | Up to 1 month |
| Trifle (assembled) | 24 to 48 hours | Not recommended |
| Pecan pie bars | 4 to 5 days | Up to 1 month |
| Fruitcake | 3 to 5 days | Up to 3 months |
| Cookie dough (unbaked) | 3 days | Up to 1 month |
Cookie dough and pie crusts freeze well for up to one month, and sturdier cakes like fruitcake last several days refrigerated without quality loss. For guidance on keeping baked goods at their best, the advice on extending cake shelf life covers the key principles clearly.
Thaw frozen desserts overnight in the fridge rather than at room temperature. Slow thawing preserves delicate textures and prevents condensation forming on the surface, which causes sticky or weeping finishes.
When it comes to serving, consider these presentation points:
For creative dessert ideas around chocolate decoration and finishing touches, the guide on modelling chocolate for pastry is worth bookmarking.
I have made every mistake in this guide at some point. Rushed a cheesecake out of the fridge after four hours because guests were arriving early. Used cream cheese straight from the counter because I forgot to keep it cold. Assembled a trifle two days ahead and watched it turn to mush. Each time, the lesson was the same: the process matters as much as the recipe.
What I have found is that most people underestimate how much of festive dessert success is about timing rather than technique. The actual hands-on work for a no-bake cheesecake takes about 20 minutes. The other 12 hours? That is the fridge doing the work for you. Once you accept that, the whole thing becomes far less stressful.
The other thing I want to say to anyone making these desserts for the first time: personalise them. Swap the vanilla for almond extract. Add a layer of salted caramel to the cheesecake. Fold crushed amaretti biscuits into the trifle. Recipes are starting points, not rules. The desserts that get talked about at celebrations are rarely the technically perfect ones. They are the ones that taste like someone made them with a bit of thought and care.
Start with one dessert you feel confident about, make it well, and build from there.
— Andraz
Getting the right ingredients and tools before you start makes every recipe in this guide easier to execute. Bamchocolate offers a range of products designed specifically for home bakers working on creative dessert ideas and seasonal baking projects. The baking accessories range covers the tools and additives that support everything from crust preparation to cream stabilisation. For those who want a broader ingredient base, the BAM Large Confectionery Bundle brings together an extensive set of quality ingredients suited to preparing multiple festive treats. And if you want structured recipe guidance alongside your ingredients, the 101 BAM pastry recipe book is a practical resource for expanding your festive baking repertoire.
A no-bake cheesecake needs a minimum of 6 to 8 hours in the refrigerator to set properly. Chilling overnight for 12 or more hours gives the firmest texture and the cleanest slices.
Yes. Most no-bake cheesecakes, pecan pie bars, and trifles can be made one to two days ahead. Trifles actually taste better when assembled 24 hours before serving, as the layers have time to meld together.
A runny filling is almost always caused by warm cream cheese or cream that was not whipped to stiff peaks. Use cold ingredients throughout and whip the cream until it holds firm peaks before folding it in.
Press the biscuit crust firmly with a flat-bottomed glass and freeze it for 10 minutes before adding any filling. This sets the butter and prevents it from seeping into the base once the filling is added.
Cookie dough and pie crusts freeze well for up to one month. Assembled cheesecakes also freeze for up to one month. Thaw them slowly in the fridge overnight to preserve texture and avoid condensation on the surface.



 Tales of chocolate



 Slovenščina
 Hrvatski
 Deutsch
 Italiano
 Česky
Česky
 Polski
 Magyar
 Français
 Slovák
 Nederlands
 Español