 info@bamchocolate.com
  Login
Login 

 en
en 
 BAM Cake converter
  Login
Login Claudia
Avtorica vsebin


 Reading time:
10 minutes
Reading time:
10 minutes 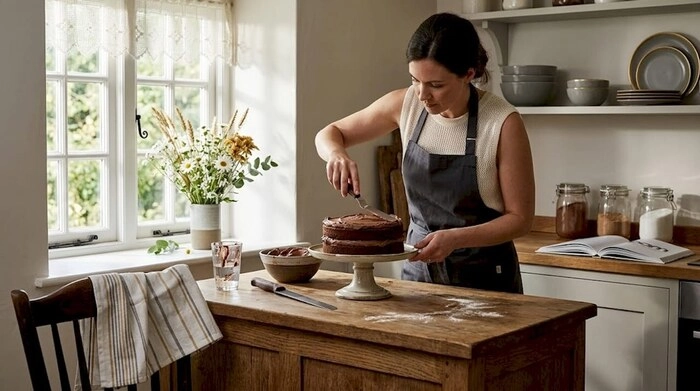
Unlock your creativity with dessert decorating ideas! Transform cakes and cupcakes into stunning masterpieces with simple techniques.
TL;DR:
- Good dessert decorating ideas can turn a simple cake into a memorable centerpiece that gets photographed and enjoyed.
- Using essential tools like a turntable, offset spatula, and bench scraper significantly improves smoothness and professional appearance without complex equipment.
Good dessert decorating ideas are the difference between a cake that gets eaten and one that gets photographed first. Whether you’re preparing a birthday layer cake, a batch of cupcakes for a school fair, or pastries for a dinner party, the decorating stage is where your baking becomes memorable. The challenge is finding ideas that match your skill level, work with the tools you already own, and look genuinely impressive without requiring a professional kitchen. This guide covers everything from creative dessert toppings to chocolate work and piping techniques.
| Point | Details |
|---|---|
| Tools matter more than kits | A turntable, offset spatula, and bench scraper will take you further than a full decorating set. |
| Toppings need timing | Add fresh fruit and delicate garnishes just before serving to keep texture and colour intact. |
| Crumb coat first | A thin base layer of frosting, chilled before finishing, prevents crumbs in your final coat. |
| Chocolate needs quality | Use couverture chocolate with at least 31% cocoa butter for glossy, professional results. |
| Practise one technique | Mastering a single decoration style builds confidence and consistency faster than attempting everything at once. |
Before exploring any dessert decorating ideas, your tools set the ceiling on what is possible. The good news is that you do not need much.
The four items that genuinely matter are:
A serrated bread knife is a budget-friendly and effective substitute for a cake leveller when it comes to flattening cake layers before stacking.
Pro Tip: Wash and dry your bench scraper and offset spatula between passes when smoothing frosting. A clean, slightly warm tool glides more smoothly and picks up fewer crumbs.
Some of the most effective dessert decorating ideas require no piping bag at all. Toppings are the fastest route to unique dessert presentation, and the combinations available go well beyond sprinkles.
Here are topping categories worth building into your repertoire:
The principle behind all of these is contrast. Textural contrast (crunchy on smooth), colour contrast (bright on pale), and flavour contrast (salty on sweet) are what make a topping feel intentional rather than decorative.
Pro Tip: Arrange toppings in odd numbers. Three strawberry halves or five pistachio clusters look more natural and considered than even groupings.
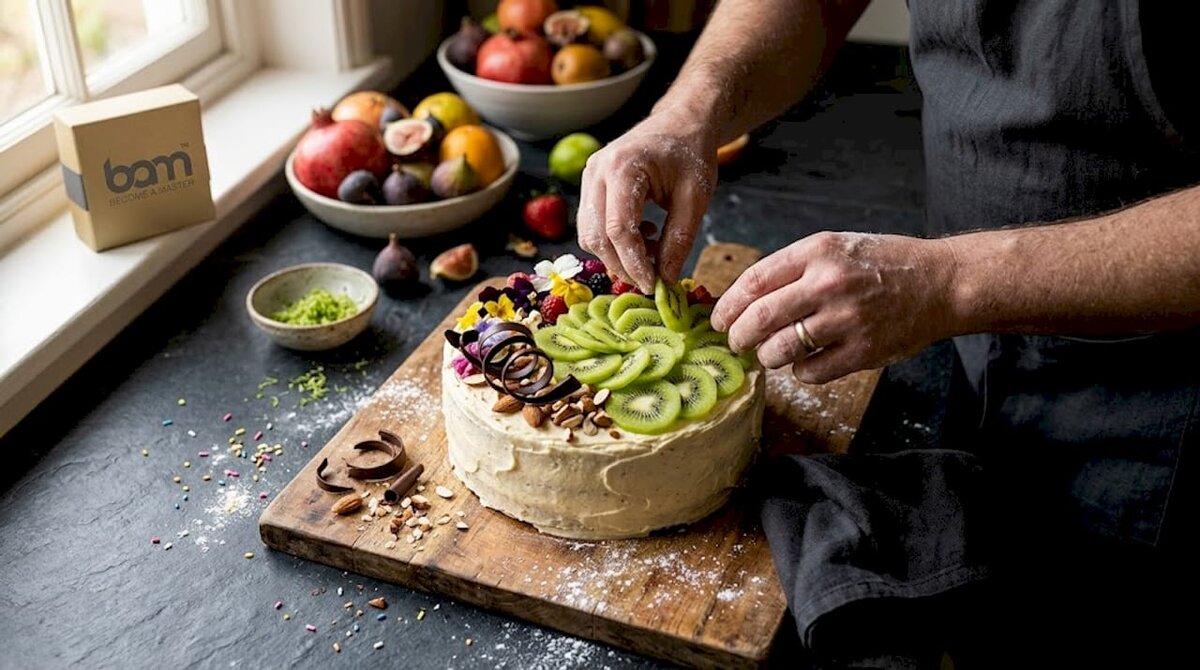
Building your skills in easy cake decoration tips means working through a logical sequence. Skipping steps is where most home bakers run into trouble.
Pro Tip: Chill your frosted cake for 10 minutes before adding a ganache drip. The temperature difference sets the drip quickly and stops it running too far down the sides.
Chocolate is the most versatile material in dessert decoration, and understanding how to use it properly opens up a wide range of options.
The starting point is quality. Not all chocolate is suitable for tempering. Chocolate chips contain stabilisers that interfere with the tempering process. For decoration work, use couverture chocolate with at least 31 to 32% cocoa butter. This produces the glossy finish and clean snap that makes chocolate decorations look professional.
Tempering chocolate involves heating and cooling the chocolate to specific temperatures to encourage stable crystal formation. The result is a coating or decoration that sets firm, shiny, and without bloom. If you do not own a thermometer, there are reliable thermometer-free tempering methods that work well for home use.
Once tempered, chocolate can be used in several ways:
Modelling chocolate is a separate material made from chocolate and glucose syrup. It handles like soft clay and can be rolled, shaped, and cut. Bamchocolate has a detailed guide on preparing modelling chocolate for pastry decorating that covers ratios and working temperature.
Different occasions call for different techniques. This table gives you a quick reference for matching your approach to the situation.
| Technique | Difficulty | Prep time | Visual impact | Best for |
|---|---|---|---|---|
| Fresh fruit toppings | Beginner | Under 5 minutes | High | Everyday cakes, tarts, pavlovas |
| Crumb coat and smooth frosting | Beginner | 45 to 60 minutes | High | Layer cakes, birthday cakes |
| Piped borders and rosettes | Beginner to intermediate | 20 to 30 minutes | Medium to high | Cupcakes, celebration cakes |
| Ganache drip | Beginner | 15 minutes | High | Layer cakes, cheesecakes |
| Chocolate shards and bark | Intermediate | 30 to 40 minutes | Very high | Special occasions, gourmet desserts |
| Moulded chocolate shapes | Intermediate | 45 to 60 minutes | Very high | Celebration cakes, plated desserts |
| Modelling chocolate figures | Advanced | 60 minutes or more | Very high | Showpiece cakes, custom orders |
A few practical notes on using this table:
Combining techniques is where home bakers often find their own style. A smooth frosted cake with a ganache drip, fresh fruit, and a scatter of roasted pistachios uses three different approaches and looks more considered than any single technique alone.
I have spent a good deal of time around home bakers at various skill levels, and the pattern I see most often is this: people buy a large decorating kit, attempt a complex design on their first or second cake, and then feel discouraged when it does not look like the tutorial.
What actually works is narrower. Focused practice on a single decoration style builds confidence and muscle memory faster than attempting everything at once. I would always recommend picking one technique, whether that is smooth frosting, a ganache drip, or a simple piped border, and making it five times before moving on.
The other thing I have learned is that taste and presentation are not in competition. A cake that is beautifully decorated but dry or overly sweet will always disappoint. The decoration is the invitation. The flavour is the experience. Get both right, and the result speaks for itself.
Imperfections are not failures. An uneven drip, a slightly off-centre rosette, a chocolate shard that broke differently than planned. These are what make a home-baked dessert look handmade rather than factory-produced. That is a quality worth keeping.
— Andraz
Bamchocolate stocks the ingredients and accessories that make these decorating ideas work in practice. The BAM baking accessories range includes tools and additives suited to both beginner and intermediate decorators. For recipe inspiration, the 101 BAM pastry recipe book covers a wide range of dessert styles with clear decoration guidance. If you are looking to build a complete decorating pantry, the basic confectionery bundle is a practical starting point. For those ready to work with fillings, the creamy fillings set and exotic fillings set both add texture and flavour options that work across cakes, tarts, and pastries.
Fresh fruit toppings, a simple ganache drip, and piped rosettes using a star tip are all beginner-friendly and produce strong visual results with minimal equipment. Starting with one technique and repeating it builds skill faster than attempting several at once.
Apply a crumb coat, chill the cake for at least 20 minutes, then add the final frosting layer. Hold a bench scraper vertically against the side and spin the turntable slowly with steady pressure for clean, smooth results.
Use couverture chocolate with at least 31 to 32% cocoa butter. Avoid chocolate chips, which contain stabilisers that prevent proper tempering and produce a dull, soft finish rather than a glossy, firm one.
Add fresh fruit and other delicate toppings immediately before serving. Placing them too early causes moisture to transfer into the frosting, which softens the fruit and affects both texture and appearance.
Yes. Reliable thermometer-free methods exist for home use, typically involving the tabling or seeding method with visual and tactile cues to judge temperature. Bamchocolate’s guide on tempering without a thermometer covers these methods in detail.


 Confectionery tips


 Slovenščina
 Hrvatski
 Deutsch
 Italiano
 Česky
Česky
 Polski
 Magyar
 Français
 Slovák
 Nederlands
 Español